
A SharePoint form with an approval step — without a premium license
"We need approvals" almost never means what the demos show. In practice it means: somebody asks for something, somebody with authority says yes or no, and both facts are recorded where the next person can find them. That is a list, a status column, and a view. The workflow engine is optional, and adding it first is why so many simple processes end up depending on a flow nobody can maintain.
The shape of the thing
One SharePoint list is the request queue. The form is the front door. Approval is an edit. SharePoint permissions decide who can make that edit, and version history records that they did.
- Requester submits the form → a list item is created with
Status = Pending. - Approver opens the Pending view → sets Status to Approved or Rejected and adds a note.
- Everyone else reads the list, filtered however they need it.
Step 1 — Build the request form
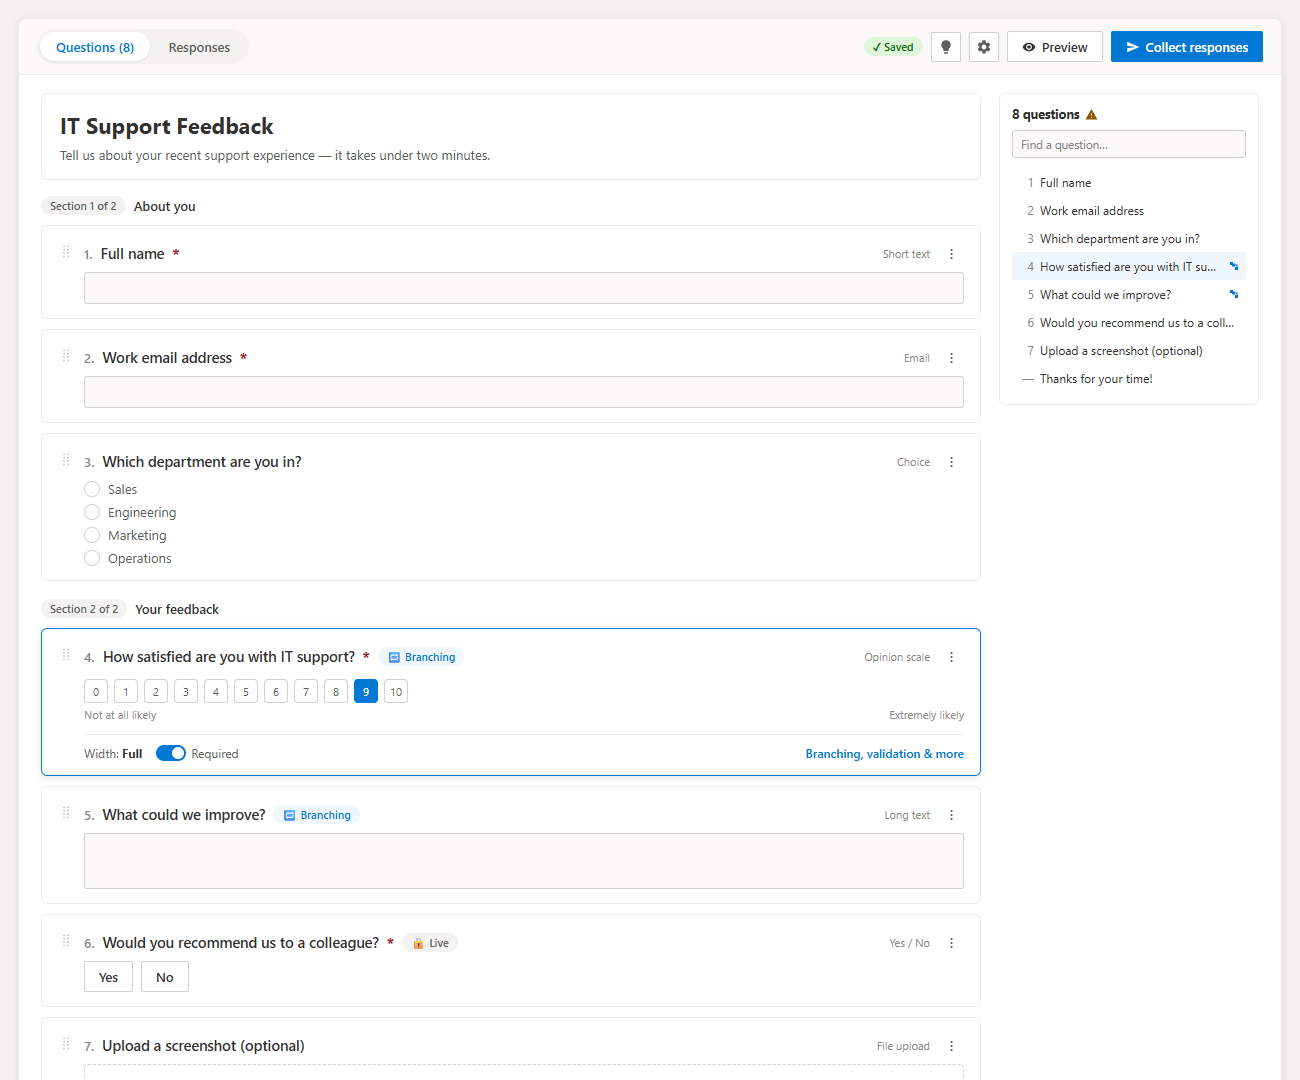
Add the Smart Forms web part to a page and design the request questions. Because the submission is written directly to the list as the signed-in user, there is no flow between the form and the queue and nothing to break when its owner leaves.
Use real SharePoint types here specifically because an approver reads this. A person picker for "who is this for", a lookup for "which project", and currency for "how much" mean the approver sees resolvable, filterable facts rather than free text.
Step 2 — Bind it to the queue list
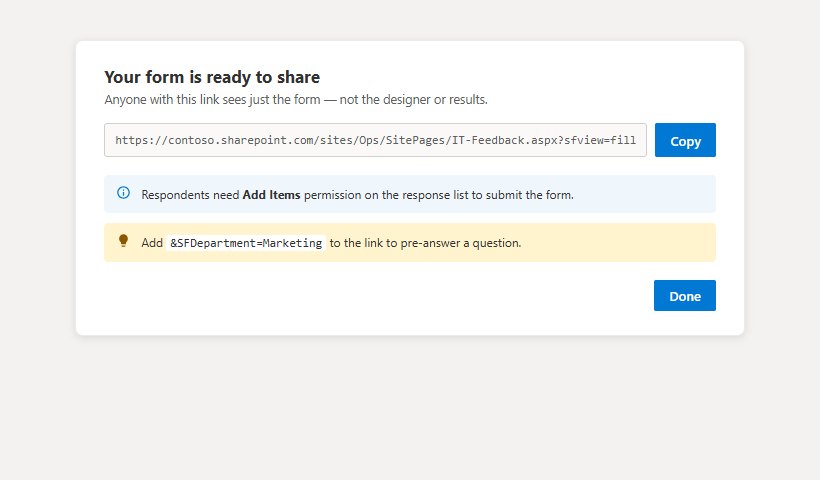
Open Collect responses and pick the destination list. Smart Forms provisions one typed column per question. This list is now both the intake and the register.
Step 3 — Add the decision columns
Status— choice: Pending, Approved, Rejected. Default value Pending.Approver— person, set when the decision is made (or pre-set if the approver is fixed).Decision notes— multiple lines of text, for the "why", which is the part people actually go looking for six months later.Decision date— date, so you can measure turnaround.
Leave all four off the form. Requesters should not be able to submit a request that arrives pre-approved.
Step 4 — Make the queue readable
Create a view filtered to Status = Pending, sorted oldest first, and set it as the default on the approver's page. Add conditional formatting so Approved is green and Rejected is red in the all-items view. Approvers do not need training if the page opens on exactly the items waiting for them.
Add a second view grouped by requester or by month for the reporting conversation, and a third filtered to items older than five days if turnaround matters.
Step 5 — Notification, in ascending order of effort
- SharePoint alert on the list, set to "anything changes" or "new items", sent to the approver. Zero build, no license, no maintenance.
- A rule on the list (Automate > Rules) — "notify someone when a column changes" — which covers "tell the requester when Status changes" nicely.
- A flow, when you need more than notification.
When you do need Power Automate
Be honest about the threshold, in both directions. A flow earns its keep when:
- the approver is calculated — the requester's manager, or a routing table by cost band;
- you need escalation or reminders after a deadline;
- the decision must happen inside a Teams approval card or an actionable email, not in the list;
- approval has to trigger something downstream — a ticket, a purchase order, an account.
Notice that none of those are about collecting the request. The intake never needed a flow. Keeping intake flow-free means that when the routing logic does change, you are editing one thing rather than two.
The audit trail
Turn on versioning for the list before go-live. Item version history then answers "who approved this, when, and what did it say at the time" without a flow run history that expires. Combine it with a permission model where requesters have Contribute and approvers have edit rights on the decision columns, and the control is enforced by SharePoint rather than by convention. If you are not sure who can currently edit that list, a permissions audit is the honest first step.
Related
Get your first result in about 10 minutes
Visual permissions audit + Excel export. No PowerShell. Free, MIT licensed, no sign-up.
- Download the .sppkg package from the latest release.
- Upload it to your tenant App Catalog.
- Add the web part to a SharePoint page.
Email me when a new release ships
No marketing spam. One short email when a new release ships. You can unsubscribe anytime.
Frequently asked questions
Can I add approval to a SharePoint form without Power Automate?
Yes. Approval is a status column plus a filtered view of pending items and an alert. The decision is an edit to the list item, governed by SharePoint permissions, and version history is the audit trail.
When do I actually need a flow?
When the approver is calculated rather than fixed, when you need escalation or reminders after a deadline, when approval must happen inside a Teams card or email, or when approval must trigger something in another system.
Does approval need a premium Power Automate license?
Not for this pattern. The intake and the decision both happen inside SharePoint. Premium connectors only enter the picture if you route the request into another system.
How do I stop requesters approving their own requests?
Keep the decision columns off the form and control edit rights on the list with SharePoint permissions, so requesters can create items but only approvers can change status.
Where is the audit trail?
In list item version history: who changed the status, from what to what, and when. Turn versioning on for the list before you go live.
The SharePoint forms guides
Pick the right form approach, build it against a SharePoint list, then compare it with the paid tools.
Understand
Every way to collect data into a SharePoint list, and what each approach costs you.
Microsoft Forms, list forms, Power Apps and SPFx compared by job.
Where responses land, who can edit them, and why that decides the choice.
Build
Free SPFx form that writes straight to a SharePoint list — no Power Automate, no premium license.
Skip the connector chain: submit directly into the list item.
Show and hide questions based on earlier answers.
Required fields, formats and ranges enforced before submit.
Attach photos and documents to the created list item.
Was this page helpful?
One click. No form, no email address.
Missing something in SharePoint Smart Permissions? Feature requests and bug reports go straight to the developer on GitHub — no account needed to read, free account to post.
Request a featureRelated tool
SharePoint Smart Permissions
Visual permissions audit + Excel export. No PowerShell. Free, MIT licensed, no sign-up.
Keep reading
Routing SharePoint form responses to Teams and email
One flow, triggered on the list rather than the form, routes every submission to the right channel or mailbox — and keeps working if you rebuild the form.
SharePoint form validation rules that actually hold
Most SharePoint forms validate in one place and leak in three. Here is which layer catches which mistake, and the rules worth setting on every form you build.
Build a multi-page SharePoint form (wizard) for free
Thirty fields on one page is a completion-rate problem. Splitting the same thirty fields into five short steps is not.
Prefer a hands-off move?
Let our team move and rebuild your forms and flows
Our team plans the move, remaps your Power Automate flows and Microsoft Forms, recreates connections in the new tenant, and tests every flow before you switch over.
About the author
Sean Regan
SharePoint & Microsoft 365 consultant with 20+ years of hands-on experience building SPFx web parts, migration tooling and tenant-grade automation. Maintainer of the open-source SharePoint Smart Solutions suite.